Ever since early spring, the bees have been hard at work collecting pollen and nectar. But July marks the time of year when all their efforts finally pay off. At least, for us keepers because it’s Harvest Time!
[Of note, we only had one hive (The Golden Girls) ready this year. The other two were installed this spring and it’s best to allow them at least one season to build up both brood and comb.]
What follows is a pictorial run-through of our experience from hive to bottle.
PHASE ONE: THE HIVE MIND
The first, and likely most complicated issue of the harvesting process is figuring out how to get X-pounds of honey out of the hive. It’s especially challenging when tens of thousands of bees have been working diligently to create and store it and are not inclined to give it up. In the old days*, beekeepers had to destroy the skep hives to get to the honey, but thanks to Dr. Langstroth, we modern keepers can pull individual frames with relative ease.
I emphasize the word “relative”.
Getting the bees out of the honey supers can be a challenge. Some keepers like to use a bee escape (a wooden or plastic contraption that allows bees to move out of the honey supers but won’t let them back in), but we haven’t had much success with them in the past. Instead, CobraMrsFit and I used a fume board which is basically a wooden cover with a cotton cloth interior and a metal top.
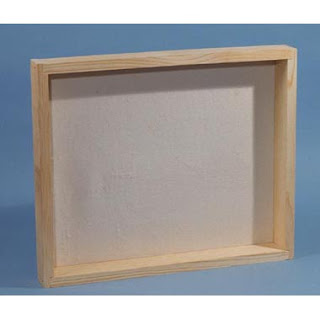 |
| Yup. That’s all there is to it.** |
Normally we’d place that bad boy with the metal to the sun for a few minutes to heat it up and then spray down the cotton interior with the Smelly-Stuff***. We prefer Ficher’s Bee Quick because it has a manageable, cherry scent. There are other products out there that are just as effective, but CobraMrsFit and I agree many smell like rotting death. With the fume pad heated up good and plenty, the Smelly-Stuff begins cooking off some impressive stench (cherries/rotting death) and we’d replace the top-cover and inner cover with the fume pad and let it work its magic. The smell drives the bees down into the hive, allowing us to pull the honey supers off.
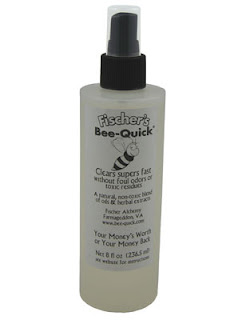 |
| Smells like….victory.**** |
Unfortunately, this year it was overcast, so I decided to place the fume board in the oven at 170 degrees F.
[Pro-Tip: Don’t place a fume board in the oven at 170 degrees F.]
Deciding that burning the house down was boarder-line stupid, we opted to just spray the board without the benefit of heating it up first. Thankfully, it worked just as well because after 5-10 minutes, the upper honey super was mostly clear of bees. We removed the top super, transfered the frames into an empty super (brushing stragglers with our bee brush), and then repeated the process until we’d removed all the honey we needed. This year we took approximately 17 frames of honey, although not all of them were packed to the gills.
With our golden prize in hand, we returned to the back porch and began prepping for the extraction process. But thanks to the amazing brains and “noses” of our little ladies, we soon had to relocate indoors because a whole mess of bees followed us. Like I said, they don’t like to give up their honey.
Once safely inside, we were ready for the next phase.
PHASE TWO: OPERATION EXTRACTIFICATION
There’s a lot of gear out there for extracting, but I’m a firm believer in the basics. For 2012, we used a motorized 6-frame extractor tank, two plastic buckets, a serrated “carving knife” (aka: The Serrated Knife of Dooooooom!), a cappings scratcher, a metal strainer, and several sets of clean pantyhose (not mine).
With everything set, it was time to rock and roll with the multi-step process of getting the honey out of the frames.
 |
| The extracting gear ready to go. |
Step One: Cap-Scratch Fever. Below you can see a full frame of capped honey. CobraMrsFit and I use medium frames which hold approximately 5-7 lbs of honey each. But to get to it, you have to remove the cappings.
[Of note, “capped honey” is when the bees fill a cell with honey and place a wax capping over it to seal it in.]
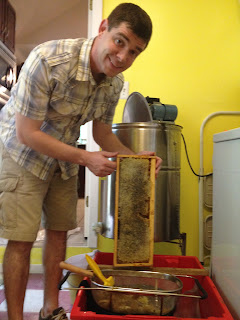 |
| There’s gold in them there frames! |
Utilizing The Serrated Knife of Dooooom, I slid it along the frame and simply sliced the wax cappings off the comb. For anything that I missed (along the top and right of the frame in the picture below), I scraped it with the cappings scratcher (small, yellow tool in the following picture).
 |
| Removing the cappings. |
 |
| CobraMrsFit wielding her WMEs (Weapons of Mass Extraction). |
A fair amount of honey tends to go with the cappings, so we dropped them into the strainer. It caught the big stuff and the pantyhose over top of the bucket below filtered the rest.
 |
| Cappings with The Serrated Knife of Dooooooom and the cappings scratcher. |
Gravity did a decent job, but there was still some honey left in the cappings, which brought us to…
Step Two: Milking the Cappings. It’s exactly what it sounds like. We placed the cappings into the leg of a pantyhose and I…um…milked it.
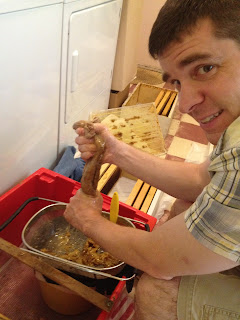 |
| “Milking” the cappings for more liquid gold. |
It was a messy, messy process.
 |
| Honey Hands! |
Step Three: You Spin Me Right ‘Round, Baby. With the cappings removed and properly milked, we placed the frames into the extractor, shut the lid, and let centrifugal force do its thing.
[Pro Tip: Whether using a hand-crank or power extractor, it’s better to start slow and then work up to a fast speed. If you go full-bore from the get-go, you risk blowing out the comb. In the industry, this is know as “bad”.]
 |
| Frames ready to spin. |
The honey was slung to the sides of the extractor and pooled at bottom. When enough had collected, we opened the gate and strained the honey through the pantyhose into the bucket.
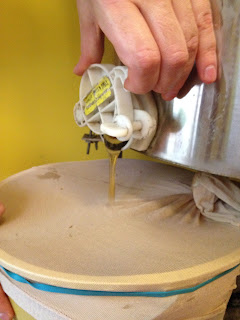 |
| The first pour. |
 |
| Straining the flotsam and jetsam from the honey. |
The junk you see in the above photo is wax comb. We filtered a lot more this year which I believe was due to using the scratcher on more cells than in the past.
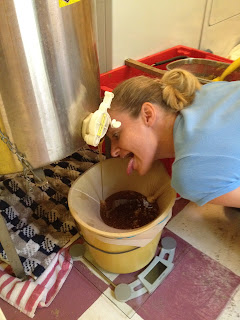 |
| An impatient CobraMrsFit. |
As you can see, SOME people weren’t willing to wait for…
PHASE THREE: ALL BOTTLED UP
With the honey strained, it was time to bottle our liquid gold. We used a mishmash of containers from last year (seen below) as well as several cases of 8 oz jelly jars. Personally, I’m not a fan of jelly jars because the honey tends to cause the inner cap to stick to the glass, but we had a hard time finding solid-lid jars.
 |
| Ready to bottle. |
 |
| The first bottle. |
 |
| Fill ‘er up! |
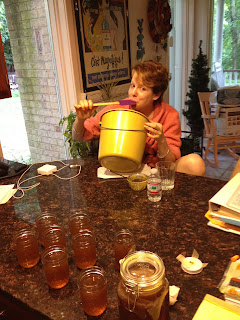 |
| An impatient Sister Unit helping us “clean up”. |
And once again, not everyone was willing to wait for us to finish.
 |
| Process complete. We ran out of jars and had to tap into the Tupperware. |
PHASE FOUR: ENJOYMENT
 |
| ‘Nuff said…. |
FINAL THOUGHTS
For 2012, we harvested a total of 43.1 pounds of honey. By comparison, the same hive produced 17 pounds in 2011. Granted, we had a mild winter and a lot of good rain throughout the spring and summer, but CobraMrsFit and I were impressed with the amount bottled. With any luck, the two new hives we installed this year will survive the winter and thrive like The Golden Girls did.
What’s interesting is that we did a side-by-side comparison with the honey from last year. Despite being from the same hive, this year’s honey was much darker. It could be a factor of the comb, the plants that the bees are foraging from, or a combination therein. Whatever the reason, it didn’t affect the flavor one bit. The 2012 honey is mind-blowingly tasty.
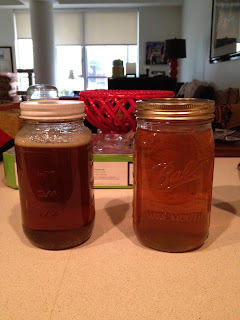 |
| Side-by-side comparison of honey from the same hive. 2012 on the left, 2011 on the right. |
And that’s it. From start to finish, it took us about 10 hours spread over two days, but a lot of that time was spent either removing the frames from the hive or waiting for the honey to strain. It was messy at times, but the reward was well worth the effort.
*Officially defined as the period between 10,000 BC and May of 1998.
***It is SO a technical term.

